Backpacks are important tools, and we use them in our daily life. Backpacks see a lot of use, and over time, even the highest quality backpacks will become damaged. If you’re out and about or on a trip, then it's important to know what to do if something suddenly breaks.
Backpack straps are critical for a fully functioning backpack, but unfortunately, straps can often become damaged. When the backpack strap is damaged, it basically makes the whole bag unusable and your contents are no longer secure. You need to be aware of the condition of your straps and replace them as soon as you see any damage.
This guide will help you understand everything about backpack straps and give a step-by-step guide on how to fix a backpack strap.
What Are All The Straps On The Outside Of A Backpack For?
There are a lot of different types of backpack straps on the outside of your bag, and you might not have even heard of some of them. Here’s a quick overview of the main types:
- Compression Strap
These straps help you focus the backpack's weight and make sure it aligns to your back correctly. This is important to help you carry heavier loads and to prevent any strain or injury. - Stash Pocket Lash Strap
This is used to seal the front pocket on a backpack. Not every model has a front pocket, but it’s important to keep it secured with a working strap. - Ice Axe Loop
These are used on the outside of a backpack to help carry some external items. Traditionally this might have been an ice axe, but now it’s more likely to be walking poles. - Base Compression/Carry Strap
These are used to carry lighter items on the outside of the backpack. Often this strap is at the bottom of the backpack and used for sleeping bags or foam mats. This won’t be as effective with heavier items that may unbalance your backpack. - Lower Compression Strap
These are used to tighten the backpack and keep the whole load pushed against your back. This helps ensure the strain is on the center of your back and not any smaller muscle groups that can be strained. - Shoulder Strap Adjustment
These are some of the most important straps on your backpack because they help you balance the load. These connect the backpack to your shoulders and allow you to carry extra weight. - Waist Belt Strap
For large backpacks, this is absolutely crucial. The waist belt strap loops around your waist to secure the load and balance it. This allows your whole body to take the weight of the backpack rather than one muscle group and lets your legs do the heavy lifting. - Chest Strap
This is used to keep your shoulder straps in place and secure the positioning of the backpack. - Load Distribution Strap
This strap allows you to redistribute the weight while walking to bring it into your shoulders. This makes it easier to control the backpack but can put extra strain on your shoulders. - Daisy Chains
These are small straps outside of the backpack and used to attach miscellaneous items to the bag.

How To Fix A Broken Backpack Strap: DIY Repair Guide
Fortunately, if your strap breaks then you can mend it even if you are anywhere in the world backpacking. Here are the best ways to do it:
1. Sewing the broken strap
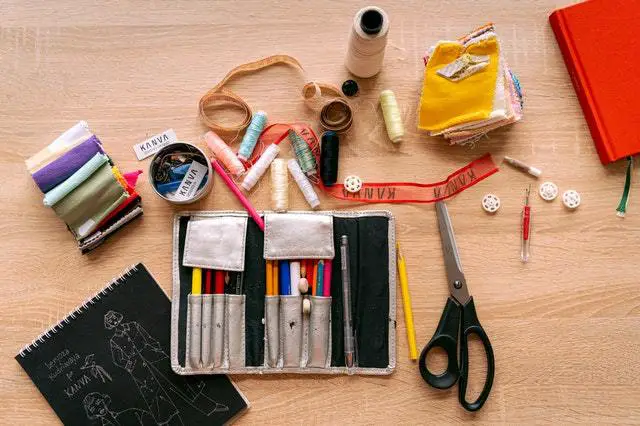
This is the most obvious method of fixing a broken strap, and for it, you’ll need a needle, thread (typically nylon), a nylon cloth, and some scissors. Once you have them, then follow these steps:
- Empty The Backpack
Take everything out of your backpack first. You’ll need to be able to move it freely to do your work. - Cut Off The Frayed Edges
Use the scissors to remove any stray threads from where the backpack strap has broken off. - Use The Cloth
Take the nylon cloth and fold it over the edge of the backpack strap. This will help to protect the material as you sew it to the backpack. - Sew It On
Thread the needle and start to sew the edge of the backpack strap to the nylon cloth. Make sure the needle is going through all the layers, so it properly attaches. Also, make sure that the stitches aren’t too close to the edge, or they might not hold. - Close The Stitch
Close the stitch by pushing the needle halfway through the cloth, looping the thread around the needle, and then pushing the needle all the way through. There are other ways to close the stitch if this doesn’t work for you. - Attach The Strap To The Backpack
Now you’ve sewn the strap to the cloth, you need to attach it to the backpack. Align the strap to the shoulder of the backpack where it should connect. Keep pressure on the cloth to keep it in place and then start sewing it in. Backstitching is the most reliable and secure method to use here. - Close The Stitch
Once you’re finished, make sure you close the stitch using the method above.
PRO TIP: This can be done while you’re out hiking or traveling. Make sure you always carry an emergency sewing kit with you.
2. Fixing the strap without sewing
Fixing the strap without any sewing is a bit more challenging and can’t be done on the road. You’ll need to have a replacement buckle, wire, wire cutter, some pliers, and a measuring tape. To fix the strap, you’ll essentially be using wire to create a hinge that connects the strap back to the backpack. To do this, follow these steps:
- Remove The Buckle
You’ll need to fully remove the buckle on the broken strap. Use the pliers to do this carefully and make sure you don’t damage the strap. - Cut Your Wire
Measure and cut your wire, so it’s about 2 inches greater than the width of the strap. You can leave this longer and trim it down later if you prefer. - Create A Hinge
Bend the wire, so it creates a hinge. You’ll need to use a mold for this and the pliers to do it effectively. This is what will hold the strap onto the backpack. - Attach The Buckle
Thread the wide onto the nylon strap on the backpack and attach the buckle onto the end of it. Thread the nylon through the new buckle, and you should be good to go!
3. Fixing with a Duct tape
If you're out and about with no option but to keep going, then duct tape can be a lifesaver. All you’ll need is the duct tape itself, and maybe scissors for cutting, so it’s a simple technique but very much a short-term fix.
To reattach the strap, just use duct tape to tape it back onto the backpack. Loop it around as much as possible to keep it secure, but bear in mind that it won’t really stand up to heavy wear and tear. Move carefully and be prepared to reapply if it starts to loosen. You should look to do a proper replacement as soon as possible.
4. Fixing a broken backpack strap adjuster
Strap adjusters are used to control the backpack strap and how tightly it sits on your shoulder. If it’s broken, then your backpack will hang in the wrong place, making it more difficult to manage weight and lead to injury. To fix a broken strap adjuster, you can do a couple of things:
- Replace The Buckle
Using wire, you can construct a makeshift buckle that you can thread your strap into. This allows you to tighten the buckle as needed. - Glue It In
Using superglue, you can reattach the buckle and keep it in place so you can still use the strap adjuster. - Use Duct Tape
Duct tape can be used to keep the buckle in place short term. This method may not allow you to adjust the backpack strap very effectively, though. - Use A Zip Tie
Zip ties are a fantastic short-term fix. Attach these around the broken buckle and thread the material through them so you can keep control of the backpack strap.
PRO TIP: All of these solutions can be done on the road, so look to include key materials like duct tape in your travel backpack.
5. Fixing a loose strap
Loose backpack straps look awful and are actually really annoying. You shouldn’t really have more than a couple of inches of excess material because your backpack should be pretty tight against your body. This allows it to move with you and helps distribute the load around your body.
There are a few ways to fix a loose strap:
- Cut The Strap
The easiest method is simply to cut the strap so it’s shorter. Make sure you don’t shorten it too much and keep it straight. Using a flame is a great way to seal the edges and eliminate any frayed bits of fabric. Make sure you don't set the backpack on fire though, it just needs to be singed. - Use Electrical Tape
Fold over your excess strap material and use electrical tape to seal it down. This will stop it from moving about while you walk. - Use Velcro
Similar to the method above, fold the excess strap material over and use Velcro to keep it in place. Ensure you trim the Velcro down; otherwise, you can end up with extra material there instead.
People Also Ask (FAQs)
How do you fix a leather backpack strap?
Due to the nature of the material, often, a leather backpack strap needs to be replaced. The material can often be reinforced or recolored if needed, but you will need a professional to help you.
How do I make my backpack straps more comfortable?
Padding can be added to a backpack strap to make it more comfortable on your back and shoulder. You can do this by sewing fleece material to the underside of the strap.
How do I stop my backpack straps from slipping?
You can stop your backpack from slipping by making sure it’s adjusted correctly. You can tighten it to your shoulder using the adjustment buckle. You can also use shoulder pads which add grip to your backpack.
Why do backpacks have chest straps? How do you fix these if they break?
Chest straps help spread the weight of the backpack across your chest, putting less strain on smaller muscle groups. You can replace these fairly easily using the methods above, but usually, you'll just need to replace the buckle.


